
Few desserts are as comforting as a bowl of cold, velvety chocolate ice cream. Making it at home takes a little care, but the difference is easy to taste. This chocolate ice cream recipe delivers deep cocoa flavor, a silky texture, and just the right sweetness. With simple ingredients and a few easy techniques, you can create a delicious homemade treat for family, gatherings, or any sweet craving.
What Makes This Chocolate Ice Cream Recipe Special?
Homemade ice cream gives you control over nearly every part of the dessert. You can decide whether the chocolate should taste mild and sweet or bold and slightly bittersweet. Likewise, you can change the toppings, mix-ins, and serving style according to the occasion.
This chocolate ice cream recipe uses both cocoa powder and melted chocolate. As a result, the finished dessert has a fuller chocolate character than a base made with only one of them.
The cream contributes richness, while whole milk keeps the mixture from becoming excessively heavy. Egg yolks, meanwhile, give the base a smooth custard-like body.
Most importantly, the recipe does not depend on complicated ingredients. Once your ingredients are prepared, the cooking process becomes fairly straightforward. If you enjoy simple homemade dishes with a creamy texture, you may also like our guide to creamy polenta, a comforting dish made with a few basic ingredients.
Ingredients for This Chocolate Ice Cream Recipe
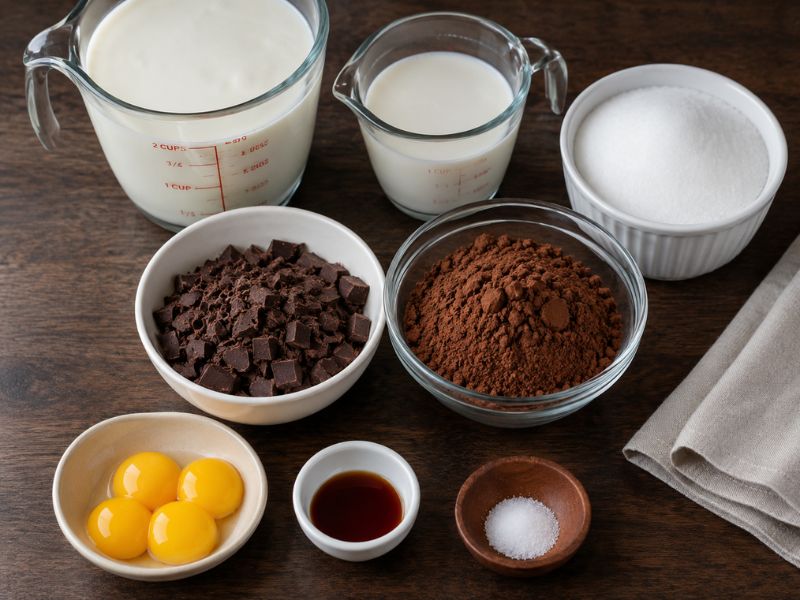
Set out and measure everything you’ll need before starting the recipe. This makes the preparation smoother and helps prevent mistakes.
- 2 cups heavy cream
- 1 cup whole milk
- ¾ cup granulated sugar
- ½ cup unsweetened cocoa powder
- 4 ounces semisweet or dark chocolate, finely chopped
- 4 large egg yolks
- 1 teaspoon vanilla extract
- ¼ teaspoon salt
Choosing the Right Chocolate
The type of chocolate you choose can noticeably affect the final flavor. Semisweet chocolate creates a balanced result that is neither overly sweet nor intensely bitter.
For a darker and more sophisticated flavor, use good-quality dark chocolate. On the other hand, milk chocolate can be used if you prefer a sweeter dessert, although it will produce a softer chocolate profile.
For the cocoa powder, always choose an unsweetened variety because the recipe already contains sugar.
How to Make Chocolate Ice Cream Recipe From Scratch
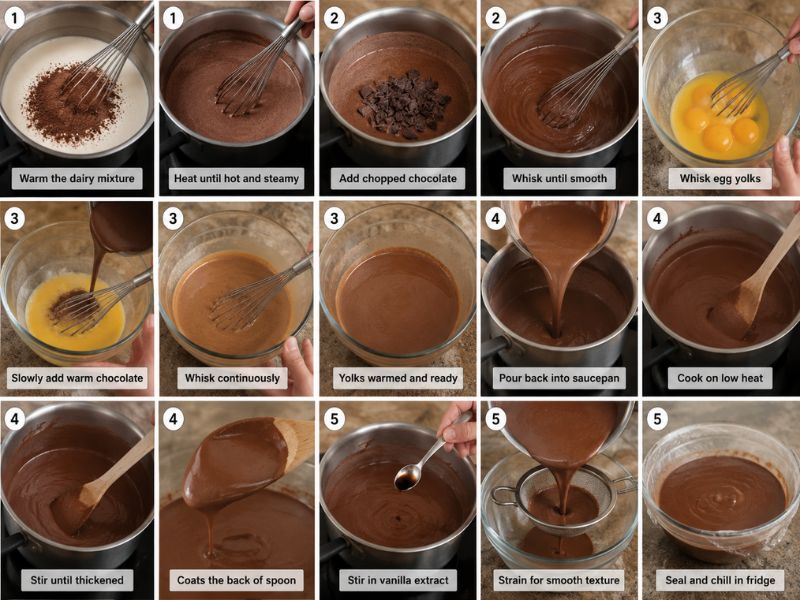
1. Warm the Dairy Mixture
Pour the heavy cream and whole milk into a medium-sized saucepan. Add the sugar, cocoa powder, and salt.
Whisk everything together before placing the saucepan over medium heat. Continue stirring as the mixture warms so the cocoa powder does not settle at the bottom.
The liquid should become hot and steamy without reaching a rolling boil. Once you notice that the sugar has dissolved and the cocoa is fully blended, remove the pan from the heat.
This gentle approach is important because excessive heat can make the next stages more difficult.
2. Melt the Chocolate Into the Mixture
Add your finely chopped chocolate to the hot dairy mixture.
Let it sit briefly, then whisk until every piece has melted. The mixture should become smooth and glossy, with no visible chocolate chunks remaining.
If some pieces are stubborn, return the pan to very low heat for a short time while stirring continuously.
At this stage, you should have a rich chocolate liquid with a pleasant aroma. Set it aside while you prepare the egg yolks.
3. Prepare the Egg Yolks
Place the egg yolks in a separate heatproof bowl. Whisk them until they become smooth.
The yolks are going to be combined with the warm chocolate mixture, but adding hot liquid too quickly could cook the eggs. Therefore, you need to warm them gradually.
Take a small amount of the chocolate mixture and slowly pour it into the yolks while whisking constantly.
Continue adding small amounts and keep the whisk moving. After several additions, the yolks will be warm enough to combine with the remaining chocolate mixture.
4. Cook the Custard Slowly
Pour the warmed egg mixture back into the saucepan.
Place it over low to medium-low heat and stir continuously with a wooden spoon or silicone spatula.
As the custard heats, it will slowly become thicker. You are looking for a consistency that lightly coats the back of a spoon.
Do not allow the mixture to boil. A gentle cooking temperature gives the yolks enough time to thicken the base without turning into scrambled eggs.
If you use a thermometer, aim for approximately 170–175°F.
5. Finish the Base
Once the custard reaches the desired thickness, take the pan off the stove.
Stir in the vanilla extract. Vanilla may seem like a small addition, but it helps round out the chocolate flavor and gives the finished ice cream a more balanced taste.
For an exceptionally smooth result, pour the custard through a fine strainer into a clean bowl. This catches any tiny cooked egg particles or bits of chocolate that may remain.
Seal the bowl well, then transfer the mixture to the fridge to chill.
The Importance of Chilling the Mixture
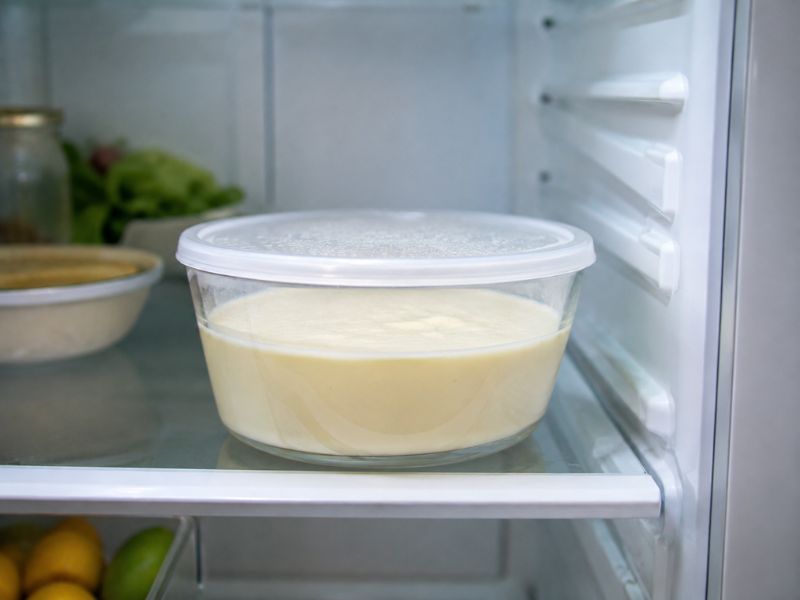
Do not rush from the stovetop directly to the ice cream maker.
The custard needs to become properly cold first. A warm base will take longer to freeze and may not develop the texture you are hoping for.
Let the mixture cool completely in the refrigerator before moving on to the next step.
Depending on your refrigerator and container, this can take several hours.
For convenience, you can prepare the base the night before and churn it the following day.
Churning the Chocolate Ice Cream
Once the mixture is cold, pour it into your ice cream maker.
Follow the instructions supplied with your machine because different models operate at different speeds and require different churning times.
As the machine works, the liquid base gradually becomes thicker. Air is incorporated into the mixture, which helps create the familiar creamy texture associated with good ice cream.
When the mixture reaches a thick, soft-serve-like consistency, it is ready for the next stage.
Do not worry if it still looks somewhat soft. It will firm up considerably once it spends time in the freezer.
Freezing Your Chocolate Ice Cream
Transfer the churned ice cream into a clean freezer-safe container.
Spread the surface evenly and cover the container tightly. Then place it in the freezer.
Allow several hours for the ice cream to become firm enough to scoop. Around four to six hours is generally a useful starting point, although the exact time depends on your freezer and container.
Before serving, leave the container on the counter for a few minutes. This brief resting period makes scooping much easier.
Can You Make This Recipe Without an Ice Cream Machine?
Absolutely. An ice cream maker is convenient, but it is not the only way to freeze homemade ice cream.
After preparing and chilling the chocolate mixture, transfer it to a shallow freezer-safe container.
Place it in the freezer and stir it thoroughly every 30 to 45 minutes during the early freezing period.
Repeated stirring helps disrupt larger ice crystals. Although this method requires more hands-on attention, it can still produce a pleasant homemade dessert.
The final texture may not be exactly the same as ice cream made in a machine, but it is a useful option when you do not own an ice cream maker.
Tips for a Smooth Chocolate Ice Cream Texture
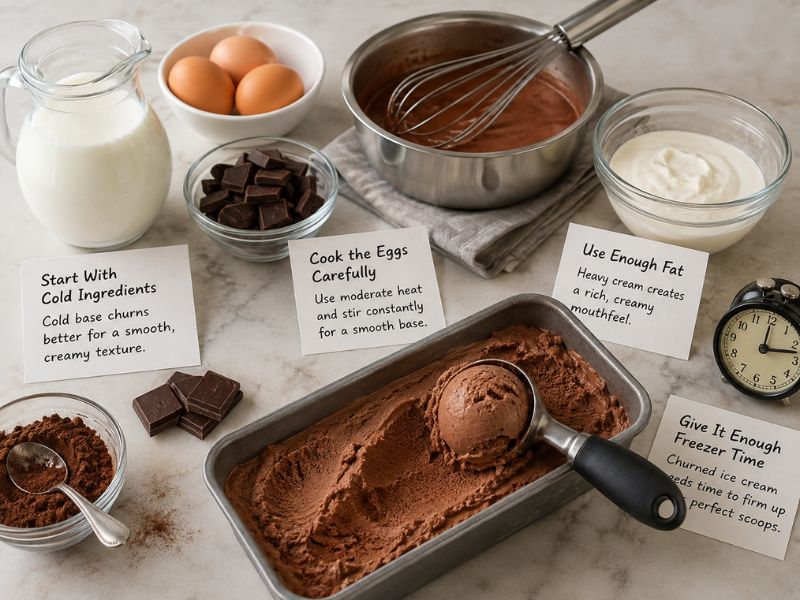
Texture is one of the biggest differences between average homemade ice cream and an excellent batch.
Start With Cold Ingredients
While the cooking process naturally warms the ingredients, the finished base should be completely chilled before churning.
The colder the base is when it enters the machine, the easier it is for the freezing process to work efficiently.
Cook the Eggs Carefully
Egg-based ice cream requires patience. High heat can cause the yolks to cook too rapidly, resulting in an unpleasant texture.
Therefore, keep the heat moderate and stir without stopping.
Use Enough Fat
Heavy cream is important because its fat content contributes to the creamy mouthfeel of the finished dessert.
Replacing all of the cream with low-fat milk can result in a thinner, icier texture.
Give It Enough Freezer Time
Freshly churned ice cream is soft and scoopable, but it needs additional time in the freezer for a firmer consistency.
Trying to serve it immediately is fine if you enjoy soft ice cream, but traditional scoops usually require additional freezing.
Chocolate Ice Cream Recipe Variations
Once you are comfortable with the basic chocolate base, you can make it your own.
Chocolate Cookie Version
Crush chocolate sandwich cookies or another favorite biscuit and fold them into the ice cream shortly before freezing.
Keep some larger pieces for texture and use smaller crumbs to distribute the flavor throughout the batch.
Chocolate and Peanut Butter
Peanut butter makes an excellent partner for chocolate.
Warm a small amount of smooth peanut butter until it becomes easy to drizzle. Pour thin ribbons through the freshly churned ice cream, then freeze.
Do not mix it completely into the base. Leaving visible swirls creates a more interesting dessert.
Mint Chocolate
For a refreshing variation, add a modest amount of mint flavoring to the chocolate mixture.
Then add small chocolate pieces before freezing. The cool mint and rich cocoa make a classic combination.
Chocolate Fudge
For extra indulgence, fold small pieces of fudge into the churned ice cream.
You can also add a thin ribbon of chocolate fudge sauce. Allowing the swirls to remain distinct gives each serving a little variation.
Toppings That Pair Beautifully With Chocolate Ice Cream
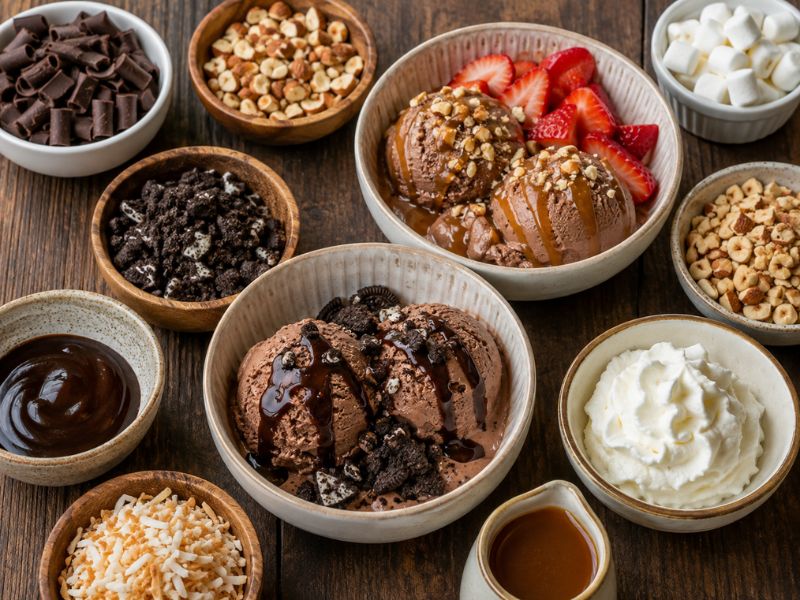
A simple scoop can become a special dessert with the right finishing touches.
Try topping your ice cream with:
- Chocolate curls
- Chopped almonds
- Crushed cookies
- Toasted coconut
- Fresh strawberries
- Caramel drizzle
- Chocolate sauce
- Chopped hazelnuts
- Mini marshmallows
- Whipped cream
For a quick dessert, place two scoops in a bowl and add chocolate sauce plus crushed cookies. Alternatively, serve the ice cream alongside warm brownies for a contrast between hot and cold textures.
Common Problems and How to Prevent Them
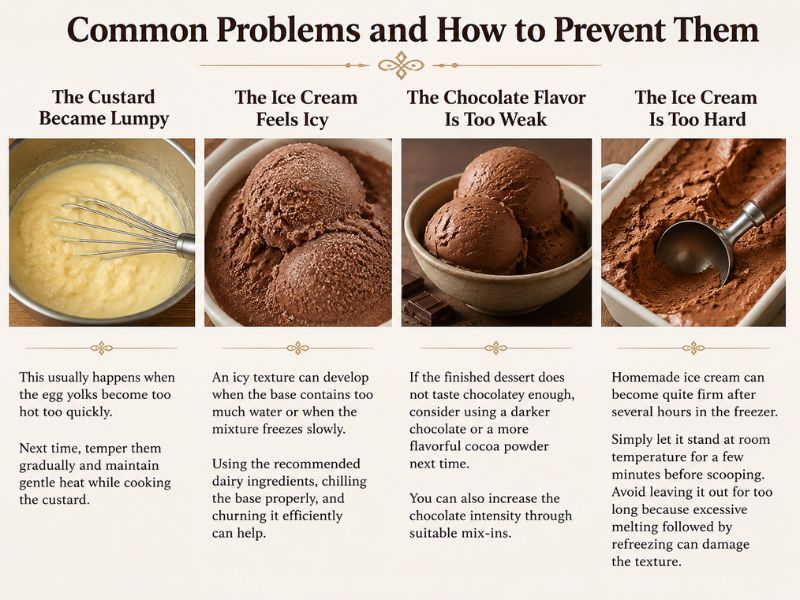
The Custard Became Lumpy
This usually happens when the egg yolks become too hot too quickly.
Next time, temper them gradually and maintain gentle heat while cooking the custard.
The Ice Cream Feels Icy
An icy texture can develop when the base contains too much water or when the mixture freezes slowly.
Using the recommended dairy ingredients, chilling the base properly, and churning it efficiently can help.
The Chocolate Flavor Is Too Weak
If the finished dessert does not taste chocolatey enough, consider using a darker chocolate or a more flavorful cocoa powder next time.
You can also increase the chocolate intensity through suitable mix-ins.
The Ice Cream Is Too Hard
Homemade ice cream can become quite firm after several hours in the freezer.
Simply let it stand at room temperature for a few minutes before scooping. Avoid leaving it out for too long because excessive melting followed by refreezing can damage the texture.
How to Store Homemade Chocolate Ice Cream
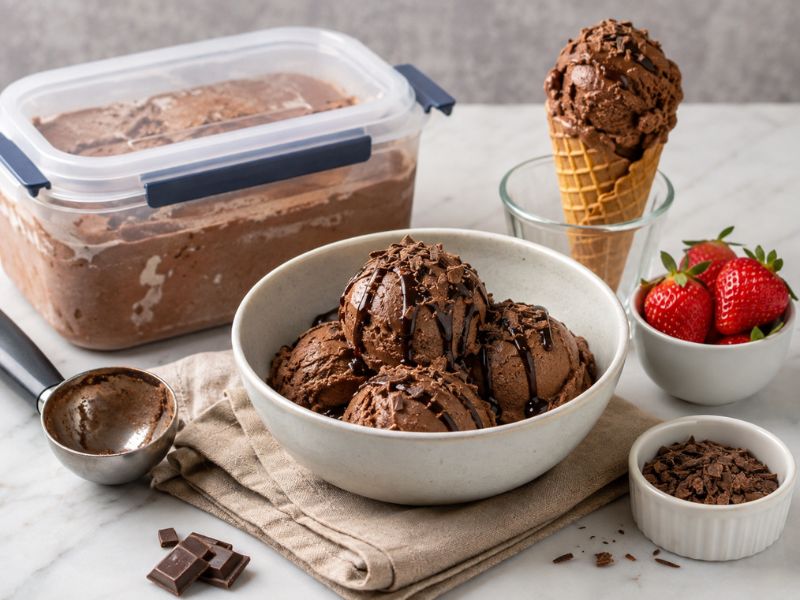
A tightly sealed freezer-safe container is the best choice for storing your dessert.
Try to keep as little empty space as possible between the ice cream and the lid. Less exposed air means less opportunity for ice crystals to develop on the surface.
Keep the container closed whenever you are not serving the ice cream.
Also, avoid repeatedly thawing and refreezing the entire batch. Instead, take out only the amount you plan to eat.
Serving Suggestions
Homemade chocolate ice cream is delicious straight from the scoop, but presentation can make it even more appealing.
Serve it in a chilled bowl, an ice cream cone, or a waffle bowl.
For a simple finishing touch, sprinkle chopped chocolate over the top. If you want something more impressive, add whipped cream, chocolate syrup, and a few berries.
You can also use the ice cream as part of another dessert. A scoop beside warm chocolate cake, brownies, pancakes, or waffles creates an especially satisfying combination. If you’re planning a comforting homemade meal before dessert, our chicken korma recipe is another flavorful option to try.
Frequently Asked Questions
1. Can I make this chocolate ice cream recipe without eggs?
Yes, you can prepare an egg-free version, although the finished texture may be lighter and less custard-like.
2. Can I replace heavy cream with regular milk?
You can, but the ice cream will generally have less richness and may develop a firmer or icier texture.
3. How long does homemade chocolate ice cream need to freeze?
After churning, allow approximately 4 to 6 hours for the ice cream to become firm enough for traditional scoops.
4. Why did my homemade ice cream become icy?
Icy ice cream can result from excess water, insufficient chilling, or a slow freezing process.
5. What can I mix into homemade chocolate ice cream?
Chocolate chips, crushed cookies, nuts, caramel, peanut butter, and fudge pieces are all delicious additions.
Conclusion
Making chocolate ice cream at home is a rewarding kitchen project because the process allows you to create a dessert that matches your preferred level of sweetness, richness, and chocolate flavor. This chocolate ice cream recipe combines cocoa powder, real chocolate, dairy, and egg yolks to create a luxurious base that can be enjoyed on its own or transformed with creative additions. Although the custard requires careful attention, the individual steps are simple once you understand why each one matters. Furthermore, proper chilling and freezing are just as important as the cooking itself, so give the mixture enough time to develop its final texture. Once you have made your first batch, you can experiment with cookies, peanut butter, mint, fudge, nuts, or your favorite toppings. Ultimately, homemade chocolate ice cream is a delicious treat that turns ordinary ingredients into something genuinely special.